Posts

Showing posts from May, 2012

Rainy Day Project - Grungepaper Bracelet

Image
Grungepaper Bracelet I was cruising blogs the other day for inspiration and I ran across this wonderful grungeboard/grungepaper bracelet by Sarah at La-De-Dah .  When I saw it I knew my youngest daughter would love something like this. Since today was a rainy day and I finished all my chores yesterday, I decided it was time to give this a go.  I didn't have any Grungeboard for the bottom layer, so I used two layers of Grungepaper and lined the inside with a soft felt.  Here's how it looked once finished... and here is a few pictures that I took while I was making it.  I usually forget to do this part... I cut the strips  at one inch and two inches wide with my deckle trimmer and ran them through the Vagabond with embossing folders.  My daughter picked a circles design for the bottom layer and a floral design for the top. I inked them up with several Distress Stains and Distress Inks and edged them in B...
Compendium of Curiosities II

Image
Brushless Watercolor - Week 7 The technique for Week 7's Compendium of Curiosities Challenge at Studio L3 is found on page 49 in Tim Holtz's  book (Compendium of Curiosities Volume II).  It was fun and easy to put this tag together!  I used watercolor paper to create the tag and Distress Inks and Distress Stains. This week's sponsor is eclectic Paperie  and one lucky participant will be chosen at random to receive a $25 gift certificate. ...and now that I have a nice pile of stuff on my desk, I think I'll go back to playing and see what else I can some up with. Hope everyone is having a great weekend!!

A Compendium of Curiosities II

Image
Tissue Wrap Collage - Challenge 6 Finally had some time to work on Challenge 6 set by Linda at Studio L3  for "A Compendium of Curiosities Volume II" by Tim Holtz.  This weeks challenge using the technique on page 38 in the book called Tissue Wrap Collage. This week's challenge is being sponsored by The Funkie Junkie Boutique so go check them out! They will be providing a $25 gift certificate for one lucky winner! I can't believe I made the deadline!  I ended up using the little UTEE/porcelain flowers that I had originally made for  Tim Holtz' May Tag.  I like them better on this tag.  For my little "extra" touch I added Perfect Pearl Mist.    I also had to make my own stamped tissue paper since I couldn't find anyone in our area selling Tim Holtz tissue paper and didn't have time to order it and still make the deadline.  My first attempt of this technique was a terrible failure.  LOL, but ...

12 Tags of 2012

Image
May - Sewing Mends the Soul... Finally completed my May Tag following along with Tim Holtz.  Took a few days and a bit of rummaging in my old sewing supplies, but I like the way it came out.  I tried the porcelain flowers technique with my Melting Pot and UTEE, but I didn't like how my little flowers came out.  That is sometthing I'll have to try again some other time.  I'm liking the flatter tag better I think.  It's got some embellishments that give it depth...but not so big and heavy that they overpower the tag.  I used pattern paper from an old pattern and a couple of sewing related stamps by Just For Fun.  I dug out my old Dymo label maker for the quote.  Hope I can get my CC2 Challenge #6 tag done before Thursday night's deadline.  My first attempt was a disaster.  Just don't flip this tag over and look at the back!!  I hated to waste a good tag, so I yanked off the grungeboard embellishments I had put o...

Compendium of Curiosities II

Image
Shattered Stains - Week 5  I finally got my "A Compendium of Curiosities Volume II" by Tim Holtz, so now I can play along in the challenges set by Linda at Studio L3 .  Each week a new challenge is issued using the techniques in the book.This week's challenge was to follow the "Shattered Stains" technique on page 48.  This week's challenge is being sponsored by Simon Says Stamp  so go check them out!  A gift certificate of $25 will be awarded for one lucky randomly-selected winner I'm running a bit late but at least I got it done!  (CORRECTION! I ran too late for the challenge, but HEY I had fun doing it anyway and hopefully I'll make it on time for the one that starts today, since I know what time the deadline is now.) I had to do a bit of digging around in my cabinets to find the art supplies I wanted to use.  Once I got started I could have played for hours, but alas...chores are calling my name as well as my bed.  Another...

Happy Mother's Day!

Image
Mother's Day Cards Finally got my Mother's Day card finished and ready to give.  The last few days I've just been too tired to work on anything...so I just had to content myself to read blogs and soak in all the glorious colors and ideas that others have been sharing. Had a bit more energy today, so I was determined to get my cards done before they got too late!!  One has been delivered and one will go in the mail tomorrow, with the last one being delivered tomorrow night. Hope everyone has had a wonderful weekend...it back to work for me tomorrow!

Another Night at the Art Desk

Image
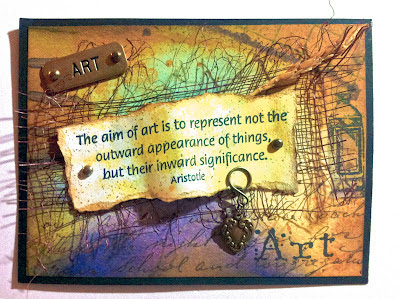
More inky fun here tonight.  I really should wait to photograph and post until the mornings since the colors really don't photograph so well here at my art desk....but I'm usually too busy getting kids off to school, taking care of all the 4 legged babies in the house and me off to work to have to dig out the camera and blog. The colors are just a little bit too vibrant in the photo, but all in all they aren't too far off.  I dug out my Distress Inks and my Marvy Matchables and my new handmade blending tools and had fun layering on the color.  I pulled down boxes of stamps from the closet and went searching through my word and quote stamps until I found some that spoke to me.  I've got BOXES and BOXES or stamps in the closet and it is so fun to pull them down and rummage through them!  Someday I hope to have shelves so that I can pull out my favorite ones and line them up so I can grab them easier when I want them. I really enjoy my late night art time,...

Thistles and Bees

Image
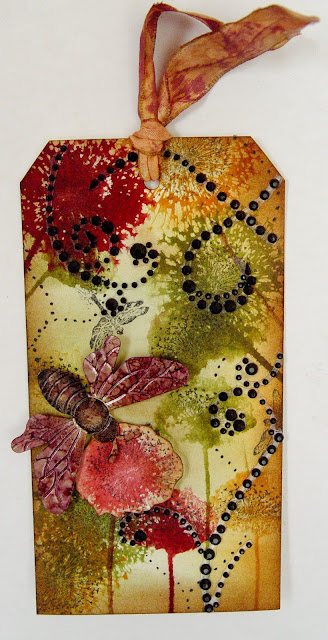
I went out walking yesterday morning at the local Antique Market, then spent time some time downtown on the waterfront with my youngest daughter and her boyfriend watching the jet skit races.  So after a hot day out my hubby and I had a late dinner downtown on the waterfront at the local Irish pub and ended the day with a walk on the waterfront. I hadn't had time to play with my inks this past week, so once I got home I spent some late night hours at my art desk.  Even though I used lots of products while playing, I managed to keep everything fairly neat and put away as I worked.  After a major cleaning a couple of weeks back, I've been trying to make an effort to put things in their place when I'm done.  Just a few more things to put away and it will be all tidy (for the most part). I hate trying to photograph anything that has a shimmer mist sprayed on it.  I have the hardest time getting all the colors and shimmer to show without the shimmer being way...

Sunny Yellow Flower Card

Image
Played at my desk a bit last night and did something different for a change. I used a couple of sheets from my K&Company Julianne Special Paper 12 x 12 stack and made a sunny little card. I fussy cut the big flowers, which already come with a touch of sparkle to their petals and used a smaller matching floral print for the background. I used Tim Holtz Distress Ink in wild honey along the edges to add some shading and soften the cut edges. I left space for the sentiment and tucked the card in my stash for when I need a last minute card. All I'll have to do is add a sentiment and it will be ready to go. The card base is a pretty off-white pearl cardstock that I get from Marco Paper, and I used a dark green cardstock for layering. Card Front Inside